Showing posts with label Projects. Show all posts

Friday, August 8, 2014

Thank You Gifts

With the upcoming arrival of baby boy, this summer I spent a large part of my free time organizing and creating. With my crazy tutoring schedule, I didn't have as much free time as I had hoped, so I enlisted a lot of help from my mom to complete all my projects. Boy, was that a huge gift!!

One project was creating thank you gifts for our nurses at the hospital where baby boy will be born. Typically, you might need or want a few thank you gifts for your Labor & Delivery nurses, and a few for your Post-Partum nurses, and in other instances, even less if these are the same people because your hospital doesn't have various wings or floors. However, because Tom works with these fabulous nurses on a daily basis, and they are so [sweetly] excited about our baby's arrival, we wanted them each to have a thank you token, and feel appreciated for what they do--even if they don't directly care for baby boy and I.

SO...that meant a LOT of gifts! After a little research, in order to hit everyone on the day and night shifts of Labor & Delivery, we needed 20 thank you gifts for L&D, and the same for Post-Partum. Whew, 40 gifts was quite a project, and could become quite expensive.  We wanted to keep it cute, and meaningful, without breaking the bank. Here's what I came up with:
Clear Treat bags from Wal-Mart
Hand Sanitizers from Bath & Body Works


Mini Orbit Gum Packs from Amazon


Candy Bars from Sams Club


Next I used my fabulous Silhouette Cameo to cut these cute tags out! We then hole punched them and added fun ribbon to attach them to the baggies, once they were filled with goodies.


I created 20 white tags and 20 blue tags, so I could easily see the difference between the ones that need to be on set out on L&D versus PP. That was just easy for me to keep track. Besides the difference in candy bars and hand sanitizer scents, the thank you bags are all the same.


The final product...in a {unused and unneeded} bowl for easy delivery to the nurses' station. I can't wait to hand them out after baby boy's arrival!

Friday, June 28, 2013

Graduation Party Ideas

Tom graduated Medical School, so clearly we needed to celebrate BIG TIME! I also finished my Masters degree this past year, so we opted for a double graduation party. I really wanted to enjoy the opportunity to be creative and make it special. I love being crafty, but often lack the time. So...I was ultra-prepared. The party was earlier in June, but I started crafting in February, so I wasn't stressed at the last minute, well, at least with the stuff that could be done in advance! :)

Here are a few ways I included both a Medical School Graduation theme and a Reading Specialist Masters degree [say that five times!] theme into one {fabulous} party:

Welcome to the Party!
Wreath with graduation pictures
                                 [yarn wrapped wreath + cardstock + pictures + scrapbooking letters]

Mantel filled with Graduation Memories and Banner
Pinterest-inspired quotes and inspirational sayings banner
Pencil and alphabet vase 
 [2 boxes of pencils + actual teacher alphabet desk strips + washed out veggie can + lots of hot glue]
A dressed up card box
                                             [I had an "extra" mailbox. I may be a *bit* of a hoarder.]

Special drink coozies for the grads
                                     [Dollar bin at Jo Ann Fabric + scrapbooking letters]
Scrub shirt cookies for dessert
Large and small versions
     [Recipe for the cookie found here: Authentic Suburban Gourmet; Recipe for the icing found here: AllRecipes; "Gourmet Writer" edible marker bought at Hobby Lobby; cookie cutters found locally]

Alphabet and school supply cupcakes

My amazing mom made this great teacher themed table runner...
and tablecloth for the drink table!
And you can't leave without a party favor!
A prescription from the Dr.!
[purchased empty pill bottles + Avery labels from Wal-Mart + a color printer + a little creativity
 + lots of different "prescription-y fonts]

We had a wonderful turn out and a fabulous time celebrating with friends and family. It was a treat to have everyone who supported us through the past years in one place to celebrate. I'm so glad I did all the detail work ahead of time, because cleaning our house and setting up was enough work the week of! And, making those cookies!! [Seriously, it took 2 days, or the equivalent of watching 5 seasons of the Office.]

Wednesday, June 12, 2013

Summer Bucket List

Each summer I make a list of all my to-do's of what I need and should accomplish for the summer. Sometimes most of the time I don't finish everything. For a to-do-list-loving-person like me, that calls for some serious disappointment, but I try to not get toO hung up on it. My list usually morphs as the summer goes and items come up or disappear. What is on my list this summer?

Summer Bucket List:

 Make a special memory gift for my niece's 18th birthday
Paint back door blue
Lose 10 pounds...aka work out and eat healthy
 Watch all 9 seasons of The Office
 See The Great Gatsby at the movie theater  Just saw it today, it was fabulous!
 Scrapbook/make photo albums for:
o  Yellowstone Vacacation (3 years ago)
o  DR vacation (2 years ago)
o  Pictures from our House (home improvement projects, etc.)
 See The Bling Ring 
 Go to the zoo
 Organize the basement
 Simplify clothes
 Read 3 books:
               o  Finish Sense and Sensibilty
               o  Memoir I ordered: Waiting For Daisy
               o  the first Harry Potter book (I've never read them!)
 Go to a [free] concert: Josh Turner
   
     I counted yesterday that I have 8 weeks left of summer...it goes so fast! Hopefully I can do all this, and more!  

Friday, February 22, 2013

A Little Laundry Room Sunshine

Who loves doing laundry? No one, right!? Well, our laundry "closet" left a lot to be desired, beyond the fact that no ones loves laundry.  And, yes, our laundry is in a closet. Anyone else have that? I have literally never seen it like that before! 

I wish I had taken a BEFORE picture, but it was bad. Ugly scratched up white-ish walls with holes from old shelves. Here are our IKEA (read: yes, again, we LOVE IKEA!) shelves, newly reorganized. I used up the rest of our black wedding picture frames and added bright colorful inspirational art to make me feel excited to do laundry. It's a good idea, right?! 

The walls are the same color as our lower level bathroom, so leftover paint = no money spent! I love the bright yellow/gold tone and how cheerful it is. It complements our living room color well, so when the closet doors are open, it doesn't look too much.


Happy laundering!

Office Makeover Revealed!

A while back I mentioned how our our office was a disaster, and I had big plans in store for it! I didn't have much money to spend, and so I focused on making a few of the simple touches that made a big difference.

I wanted to try a photo collage on the wall. I add the black frames already, but I scored some lovely frames from Hobby Lobby in their clearance/broken section and from Goodwill. After spraypainting the frames white, you could no longer see the cracks in the broken ones, or the hideousness of the old ones. I printed off some of my favorite quotes from the internet (thank you Pinterest for your help with that!) I arranged the frames on the floor before putting them up on the wall. I love how it looks!
Wall Photo Collage

Tom had an interview in Chicago, so he conveniently stopped by IKEA, which was very trusting of me. Tom isn't a shopper...except at IKEA! We had picked out all of our items online, and he only bought a few extras! ;) I love the rug ($25) and the white table ($30) and it is amazing to me how cheap you can get great stuff there, love IKEA! I splurged on those adorable Chevron pillows from Etsy ($30 for two).

The sitting area

Other than those purchases, I had everything else, it was just a matter of spraypainting bronze geese, re-arranging furniture, oh, and of course, painting the walls that cool grey color. Tom put in new baseboards after we painted. Nice work!

I love how these turned out!

Here is the whole room:


The only things left on the to-do list: Tom organizing his desk, and hanging those pictures in the corner. It feels like a library now, I just need a day to go in with a good book and a cup of coffee and sit on the couch to read!

Thursday, February 14, 2013

Keepin' it classy!

I'm so excited about this little DIY! I debuted it at my Staff Holiday Party last month (and forgot to post, oops!) and it was fun! Our events are byob, so this was perfect!  It took less than 5 minutes and was so worth it. I simply bought a glass candlestick at Hobby Lobby for $1.50. Then, I took a red solo cup, which I already had, and used super glue to attach the red solo cup to the candlestick. Done and done. Then, fill, drink and repeat!

Supplies:
Candlestick
Red Solo Cup
Super Glue


There's nothing classier than drinking from a red solo cup!

Cheers!

*Idea: Hallmark Stores (selling their version for over $10.00.)

Saturday, December 15, 2012

Office Makeover

Our office was in desperate need for a makeover! Here are some {embarrassing} photos of what it looked like BEFORE. Stay tuned for a variety of projects, and then, of course the {looks pretty good if I do say so myself} AFTER photos!

Ugly and messy

Yikes, what was I thinking with that accent wall!?
I admit, I painted that {hideous} green accent wall. It was in my "I have a house! I want to paint! I don't know what I'm doing!" phase.

Stay tuned about the office, and better yet, I little project I'm debuting tonight at my Staff Holiday Party...I can't wait! :)

Monday, September 3, 2012

House Work

We've been so busy with the back to school routine and working around the house. Here are some big projects we can finally check off our list!

I painted all the trim white, and the banisters white, too. I love the new look! Also, we finally painted all the downstairs walls and the foyer. It makes such a big difference!

Windowsill BEFORE
Windowsill AFTER
Wood banister BEFORE

White banister AFTER
White walls BEFORE
Beige walls AFTER 
Tom has been working hard, too! He ripped out dry rot, replaced the wood on both our bay windows, and put in a new back door!
Dry rot all ripped out!
A big mess
Working hard
I wish that was everything on our to-do list! At least we checked off a few items!

Saturday, June 9, 2012

Adding a Little Chalk to Our Lives

I've been wanting to do something about the garage entrance to our house. I'd love a mudroom, but considering you walk into our house and head straight into the pantry/the refrigerator/hit a wall, there ain't much room to work with! So, I thought a chalkboard wall might spice things up a bit, without taking up much space. I wanted the color of the wall to stay the same, within the chalkboard part. Since the kitchen wall is Eggplant, I thought black would look strange next to it. I looked on Pinterest (of course) for some inspiration and make-your-own chalkboard paint recipes, and I found this website/blog to be the most helpful.
http://thedecorologist.com/wp/dont-use-chalkboard-and-magnetic-paint-until-you-read-this

I still had many questions while working on the project [What color grout?, How much paint do I need to make? How many coats of paint is best? How long do you sand?], and it was hard to find a comprehensive explanation that answered all of them. I hope to provide clear step by step directions for you!

How to Make a Colored Chalkboard Wall:

Supplies:
Tape Measure
Plumb line
Level
Painters Tape
Paint
Un-sanded or Non-sanded Tile Grout in White
Paint brush
Tarp
Chalk
Sand Paper-medium or 100 grit
Trim-3 pieces of normal trim/baseboard
Trim-1 piece of large trim to create ledge
Nails
Hammer
Wood glue

*Disclaimer on the pictures: This is a very small, awkward, dark part of our house, so I had a hard time getting the lighting right. Also, the purple doesn't look Eggplant, it looks very bright. It's not, please don't think I have a ridiculously purple kitchen! :)

Directions:
Step One: Getting your surface ready
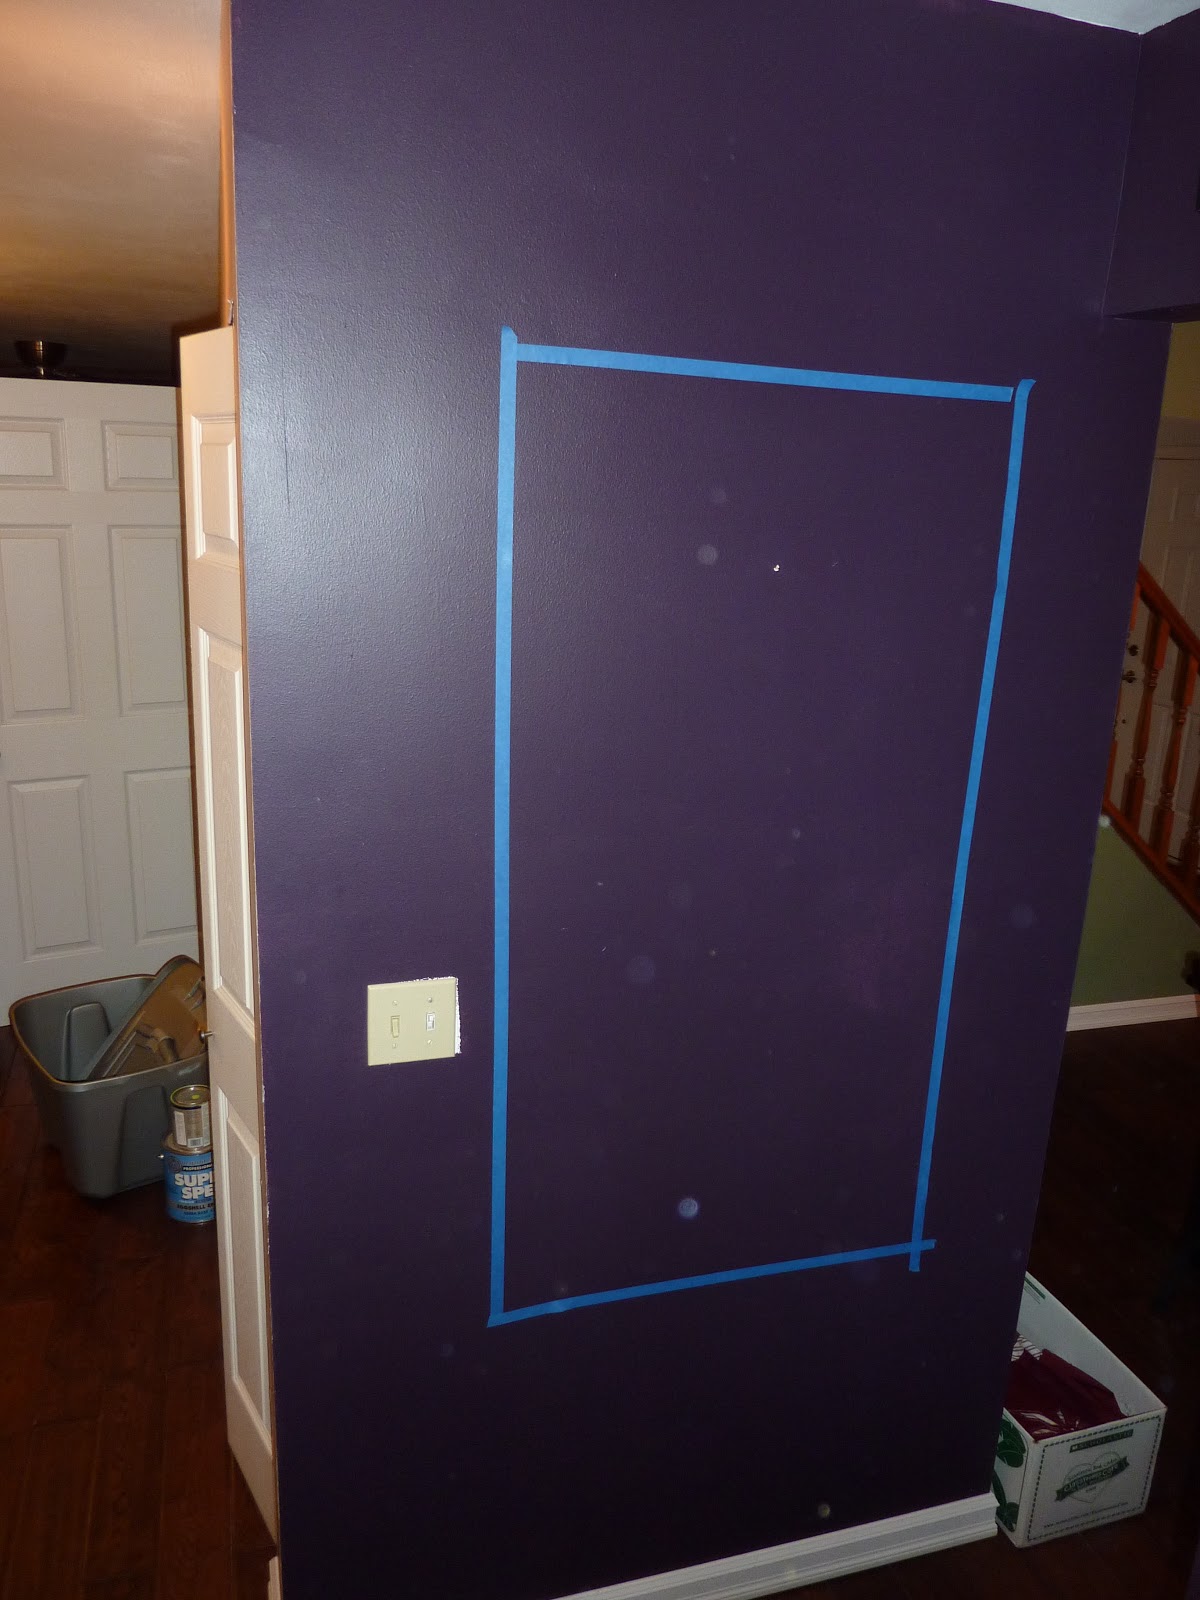
Mark the general area that you would like the chalkboard to be. Use a plumb line and level to ensure that your lines are straight. Use painters tape to mark the boundary of the area you will paint. Using a tape measure, make sure that your heights and widths are equal for the top/bottom and side/side.

Marking the general dimensions


Using the Plumb line 

Step Two: Painting your chalkboard
Gather your painting supplies and get ready to mix!  Add 2 tablespoons of Tile Grout for each cup of paint. If you use White Tile Grout, your paint color will not change. Mix well, it will be grainy, but it should be well mixed. Paint! I did 3 coats of paint because I was nervous about what would work best. I think 3 was good coverage and provided a great chalkboard. To start I made one batch of paint/grout (1 cup/2 tbsp) and that lasted almost 3 full coats. I had to add a little paint and grout to finish the bottom 1/4 of the last coat. I didn't perfectly measure it out, I just added some paint  and some grout.


Paint Supplies
 Step Three: Priming the chalkboard surface
When the paint is dry, you will sand the entire surface. 150 grit was recommended, but I didn't have that, so I used 100 grit and it worked well. I was nervous that my sandpaper was taking off the paint--see picture--and if that would be a problem, but it was fine.This part is messy! I sanded until every part had been sanded well once and there were scratches all over the board. I sanded in various motions, as well.  Next, use chalk to completely cover the board. This is supposed to "prime" the chalkboard for all of your later drawings. I used the side of the chalk and rolled it over the entire board.  Last, use a wet  rag to gently clean the surface. I had read to use a "slightly damp rag," but that wasn't getting the chalk off. I found that a pretty wet rag cleaned better and didn't have any negative effects on the chalkboard.

Sanding the surface

Sanded and scratched up chalkboard surface

Priming with chalk

All cleaned off and ready to draw!
Step Four: Framing your chalkboard
You'll need to choose the type of trim you want, which I found was the most difficult part. I used three of the same pieces to frame the top and sides. I cut the trim to the correct length and nailed the trim into the wall. Tom and I tag-teamed on this part. It was nice to have someone hold the level and trim, while another person nailed. I wanted to have a ledge for the chalk to sit for easy chalkboard use, so I used a different piece of trim for the bottom. This worked very well. Tom used his carpentry magic (and a little bit of wood glue) to add those little corner pieces-Good work Tom!

Regular trim is up!

Adding the ledge
Gluing on the small corner piece

The finished corner

The finished chalkboard
Step Five: Draw
Enjoy your chalkboard! I'm really pleased with how mine turned out.

If you try creating your own chalkboard, or have already tried one, give me your tips! Happy Chalking!